3 min read
How to Inspect Your Small Engine for Brake Replacement
In most walk mowers, a well-maintained brake system should stop the engine and any attached cutting equipment within three seconds...
9 min read

Valves control the flow of fuel vapor into the combustion chamber and the flow of exhaust gases leaving the engine. Faulty or dirty valves may stick and can develop pits, cracks or grooves that cause the engine to lose power and fuel efficiency.
Whether you’re having trouble with your engine or wanting to go through your routine valve maintenance, make sure you have our step-by-step guide on how to check your engine valves. From removing the valve, to cleaning for inspection, find information for valve maintenance for your Briggs & Stratton engines.
WARNING: Always read the engine and equipment manual(s) before starting, operating, or servicing your engine or equipment to avoid personal injury or property damage. See an authorized dealer or contact Briggs & Stratton if you are unsure of any procedure or have additional questions. Find all Engine Safety Warnings.
If you’re looking for a specific solution or step into valve repair, jump down to the section for step-by-step instructions.
How to Remove Small Engine Valves for Inspection
How Do I Check or Repair My Engine Valves?
Valve Maintenance: Lapping Valves
Re-installing Valves
Adjusting Tappet Clearances & Overhead Valves
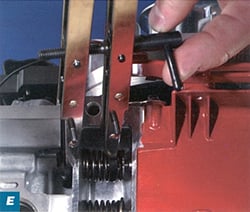
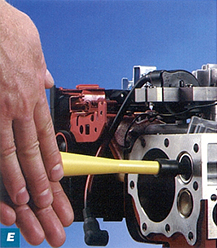
Before you can service or repair the valves, you need to remove the engine components that interfere with the engine valve.

In order to properly inspect your engine valves for maintenance or repair, you need to remove them from the engine. Find the type of engine valve retainer and follow our step-by-step guide below
NOTE: Always wear safety eyewear when removing and installing valves.


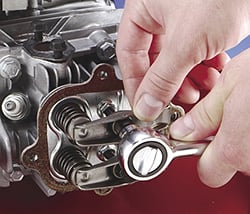
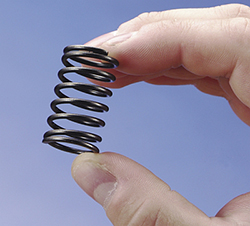
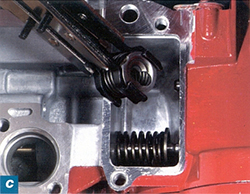
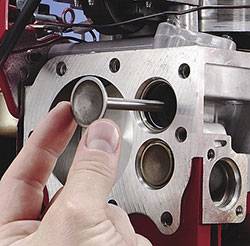
Step 4: Remove the retainers and lift out the valves, compressors and springs.
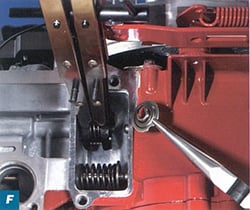
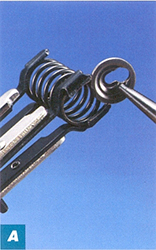
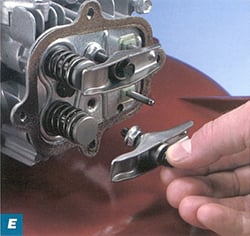
Removing Valves: Keyhole Retainers
Removing the valves for keyhole retainers requires some patience. Remember that the retainer’s key-shaped slot will help you slip the retainer off the valve stem, even when the retainer is hidden from your view by the valve spring compressor.
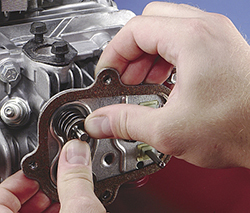
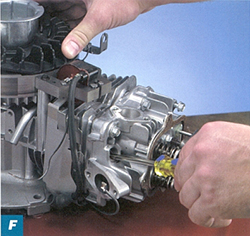
Removing Overhead Valves
Overhead valve designs vary from one engine model to another. The parts and servicing steps in your overhead valve cylinder may differ from the approach that follows, which is based on the Briggs & Stratton Intek 6-HP single-cylinder OHV. The Intek does not require the use of a valve spring compressor, making valve removal and installation simple.
Then, remove the valve cover, breather valve assembly (if equipped) and any gaskets.
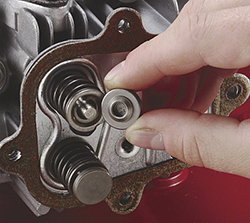
If your engine uses a keyhole retainer, line up the large slot in the retainer with the valves stem and release the spring slowly so that the stem slips through the large slot. Then, repeat the procedure for the other valve.
How Do I Check or Repair My Engine Valves?
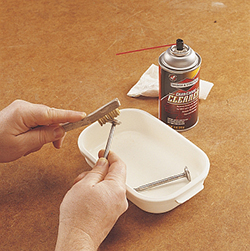
Before trying to repair your valves, look them over carefully. Residue on the valves may help you identify a specific engine problem.
Gummy deposits on the intake valve go hand in hand with a decrease in engine performance, often because the engine has been run on old gasoline. Hard deposits on either valve suggest burning oil, which has several possible causes.
Follow the steps below to check for the most likely sources of engine valve problems.
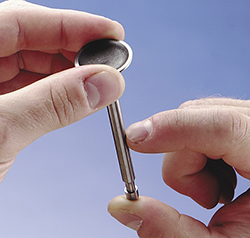
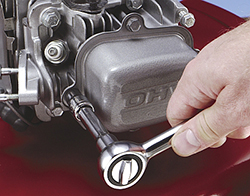
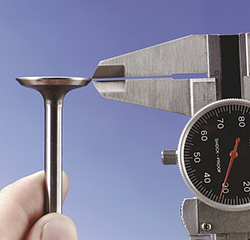
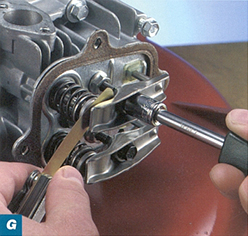
Step 3: Measure the thickness of the valve head, known as the valve head margin, using a caliper (part number 19199).
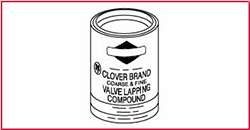
Valve Maintenance: Lapping Valves
If there are no signs of damage or valves wearing out after inspection, you can tune up the valves and seats so that the valves seal effectively (also known as “lapping the valves”).
How to Lap Valves
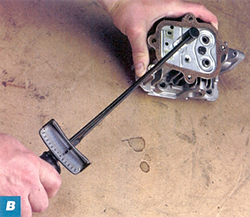
You can smooth out minor scoring and pitting of the valve face and seat to restore a valve's ability to seal the combustion chamber by lapping the valves. While lapping valves, make sure to check your progress often because it’s easy to remove the carbon building as well as the metal, further damaging the valve or seat.
Re-installing Valves after Repair & Maintenance
How to Reinstall Valves With Pins Or Automotive-Type Retainers
Note: Wear safety eyewear while reinstalling valves to protect yourself from the possibility of a flying springs.
Then, lower the valve stem through the spring.

Hold the spring toward the top of the chamber and the valve in the closed position.
How to Reinstall Valves With Keyhole Retainers
Once again, safety eyewear is absolutely necessary. Remember: a spring that is under tension can pop loose and fly through the air.
How to Reinstall Overhead Valves

Adjusting Tappet Clearances & Overhead Valves
How to Adjust Tappet Clearances
Since lapping valves removes a small amount of material from the surfaces of the valve face and valve seat, you may need to adjust the tappet clearances - the spacing between the valve stem and the tappet - after lapping and reinstalling the valves. Ask your Briggs & Stratton Authorized Dealer near you for the correct tappet clearance for your engine.
Step 1: With each valve installed in its proper guides in the cylinder, turn the crankshaft (clockwise as viewed from the flywheel end of the crankshaft) to top dead center. Both valves should be closed. Then, turn the crankshaft past top dead center until the piston is 1/4" down from the top of the cylinder.
Note: This procedure should be repeated for each cylinder on Opposed Twin and V-Twin engines.
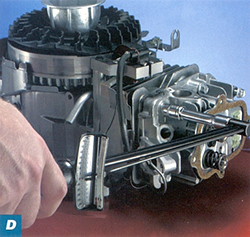
Step 2: Check the clearance between each valve and its tappet, using a feeler gauge
Step 3: If clearance is insufficient, remove the valve and grind or file the end of the valve stem square to increase the clearance. Check the length frequently as it is easy to remove too much metal.
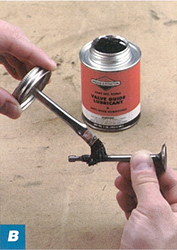
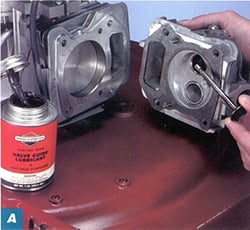
Step 4: Once the individual valve parts have been thoroughly cleaned, lubricate the valve stems and guides, using valve guide lubricant. Then, make certain there is NO lubricant on the ends of the valve stems or tappets.
How to Adjust Overhead Valves
3 min read
In most walk mowers, a well-maintained brake system should stop the engine and any attached cutting equipment within three seconds...
3 min read
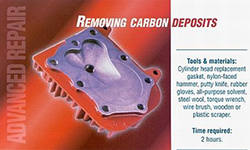
One by-product of combustion is carbon, the black soot that can collect and harden on the cylinder head, cylinder wall, piston and valves. Carbon...
1 min read
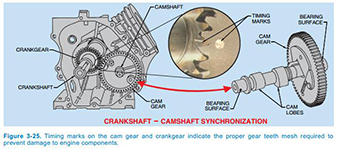
When performing snow blower or lawn mower maintenance, you may find that the timing on your small engine is off, causing your outdoor power...