2 min read
What is the best small engine maintenance schedule?
You can avoid many small engine problems and save money on parts and repairs if you follow a regular maintenance schedule. Make good maintenance a...
3 min read
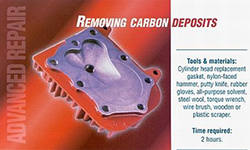
One by-product of combustion is carbon, the black soot that can collect and harden on the cylinder head, cylinder wall, piston and valves. Carbon deposits in the combustion chamber can affect engine performance, resulting in higher oil consumption, engine knocking or overheating.
Using unleaded gasoline reduces carbon build up. As a part of regular small engine maintenance, you should still remove the cylinder each 100 hours of operation and scrape off the carbon, using the tools and solvents described in this section. Clean the cylinder more frequently if you use your engine heavily.

WARNING: Always read the engine and equipment manual(s) before starting, operating, or servicing your engine or equipment to avoid personal injury or property damage. See an authorized dealer or contact Briggs & Stratton if you are unsure of any procedure or have additional questions. Find all Engine Safety Warnings.
Use the guide below to learn how to clean and remove carbon buildup on the cylinder head, pistons, cylinder wall, and small engine valves. You can jump down to the most relevant section with the links below.
Removing Engine Components for Cleaning
Removing Carbon Build Up
Re-assembling The Cylinder Head
The first step in cleaning the cylinder head is getting access to the cylinder head. You may need to remove some other components first.

5. Lift off the cylinder head. If the head sticks, strike it on the side with a nylon-faced hammer. This should loosen the cylinder head enough for your to gently lift if off the engine. NOTE: Do not pry off the cylinder head. This can damage the surface of the engine block or the cylinder head.
6. Remove and discard the old head gasket.

Always wear protective eyewear and solvent-proof gloves when removing carbon. Ask your Authorized Briggs & Stratton Dealer to recommend an all-purpose solvent that will not harm aluminum or plastic components or leave unwanted residues.
1. Place the piston at the top dead center so that the valves are closed. Then, scrape carbon gently from the cylinder head, using a wooden or plastic scraper. Take care not to dig the scraper into the aluminum. On stubborn deposits, use a putty knife, wire brush or steel wool, taking care not to bear down on the metal surfaces.


2. Clean away the remaining carbon with solvent, using fine steel wool to smooth rough spots. You can also soak metal parts for up to 15 minutes to remove stubborn deposits. Scrape again, if necessary, to loosen stubborn grit. Then, clean the area thoroughly with the solvent and set the head aside.
With the piston still at the top of the cylinder and the valves closed, use the same method to remove carbon deposits from the piston and the end of the cylinder.

3. Turn the crankshaft to open each valve, and carefully remove any visible carbon deposits on the valves and valve seats, using only a brass wire brush.
CAUTION: Do not allow grit to fall into the valve chambers or between the piston and the cylinder wall.


4. Inspect the valves and valve seats to see if they are cracked, rough or warped. Bring damaged parts to an authorized service dealer for inspection before reassembling the head.
5. Using a scraper, solvent or both, remove any remaining carbon and residue left behind by the head gasket on the cylinder head and engine block. Clean the surfaces thoroughly before installing the new head gasket. Any debris or oil left on the cylinder head or engine block may prevent a tight seal and cause eventual engine damage.
1. Inspect the surfaces of the engine block, cylinder head and new head gasket to be sure they are clean.
2. Place the new head gasket in position on the engine block. Do not use sealing compounds.
3. Set the cylinder head on the head gasket, aligning the cylinder head with the gasket and the engine block.
4. Remove each head bolt from its slot in the cardboard template. Then, insert the bolt in its original location, leaving it loose. Insert the other bolts in the same fashion. Make sure to attach any housings or brackets that are held in place by the head bolts.

5. Hand-tighten the head bolts first, without using a wrench.
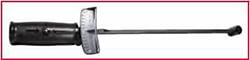
6. Tighten the cylinder head bolts in increments, using a torque wrench (service part number 19393). Turn each bolt a few turns, then proceed to the next bolt until each bolt is just snug. For final tightening, use a torque wrench. Proceed in increments or roughly one-third the final torque. Consult your small engine manual for final torque specifications. Avoid tightening a single bolt all the way before tightening the other bolts. Uneven tightening is likely to warp the cylinder head.
2 min read
You can avoid many small engine problems and save money on parts and repairs if you follow a regular maintenance schedule. Make good maintenance a...
2 min read
Small engine noise is caused by hot gases being forced out of the cylinder during each exhaust stroke. A muffler’s job is to reduce that exhaust...
2 min read
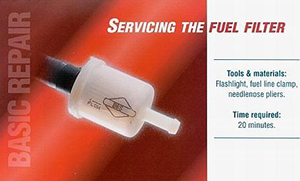
There are many benefits to changing a fuel filter in your small engine. A fuel filter is designed to properly strain the gas before it reaches the...