Spray Wand Maintenance
Prior to use, always test the spray gun to make sure it works properly. To begin, make sure the hose connection to the spray gun is secure, then test the spray-gun assembly by pressing and releasing the trigger. The trigger should spring back into place when it is released. Next, engage the safety latch, and test the trigger. You should not be able to depress it. If the trigger is loose, or can be depressed while the safety latch is engaged, or water is leaking around the gun handle, the spray gun should be replaced immediately.

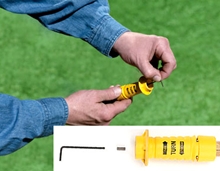
Step 1 - Shut off the engine and turn off the water supply. Depress the spray-gun trigger to relieve the pressure in the system. Detach the wand from the spray gun. If you have an adjustable nozzle, twist the nozzle to STREAM, then remove the nozzle orifice using a 2mm (or 5/64) Allen wrench. If you have Quick-Connect spray tips, simply remove the spray tip from the nozzle.

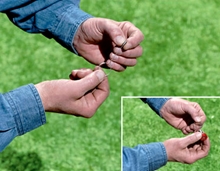
Step 2 - Use a paper clip to free any foreign material clogging or restricting the orifice or spray tip (inset). Note: Some manufacturers provide a wire nozzle-cleaning tool with the maintenance kit.

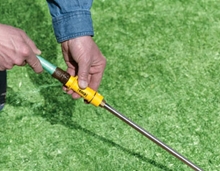
Step 3 - Flush water through the nozzle for one minute to remove debris. For an adjustable nozzle, turn the nozzle to STREAM and move from low- to high-pressure mode while flushing. Reinstall the orifice into the adjustable nozzle (do not overtighten), or install the spray tip into the nozzle, then reconnect the wand to the spray gun and test to ensure the nozzle works properly.
TROUBLESHOOTING FAQS
View solutions for handling the most common engine and product troubleshooting and maintenance questions.
VIDEOS
Learn about the latest products by Briggs & Stratton, step-by-step instructions on how to locate your lawn mower engine model number and more!


